Updating and Upgrading
Since TrinityX sees new features on regular basis, there is a need to upgrade to more recent versions. Within a release, key components can be updated.
We differentiate between updating and upgrading. Getting the latest builds of components are updates, while moving up in TrinityX releases are upgrades.
Upgrades
Pull upgrades within 14 release
Within a major release, upgrades are pretty straight forward. For example, TrinityX 14, allows for upgrading to 14.1, 14.2 ... to 14.4, the latest 14 release.
Before pulling or cloning from github, make sure to choose the correct release. The main branch on github is always the latest. It is possible to clone 14.4 release by selecting it first:
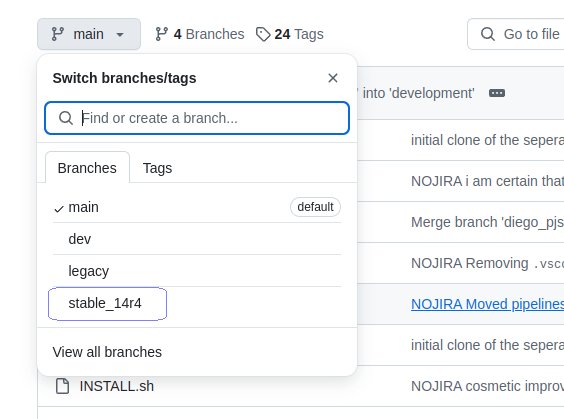
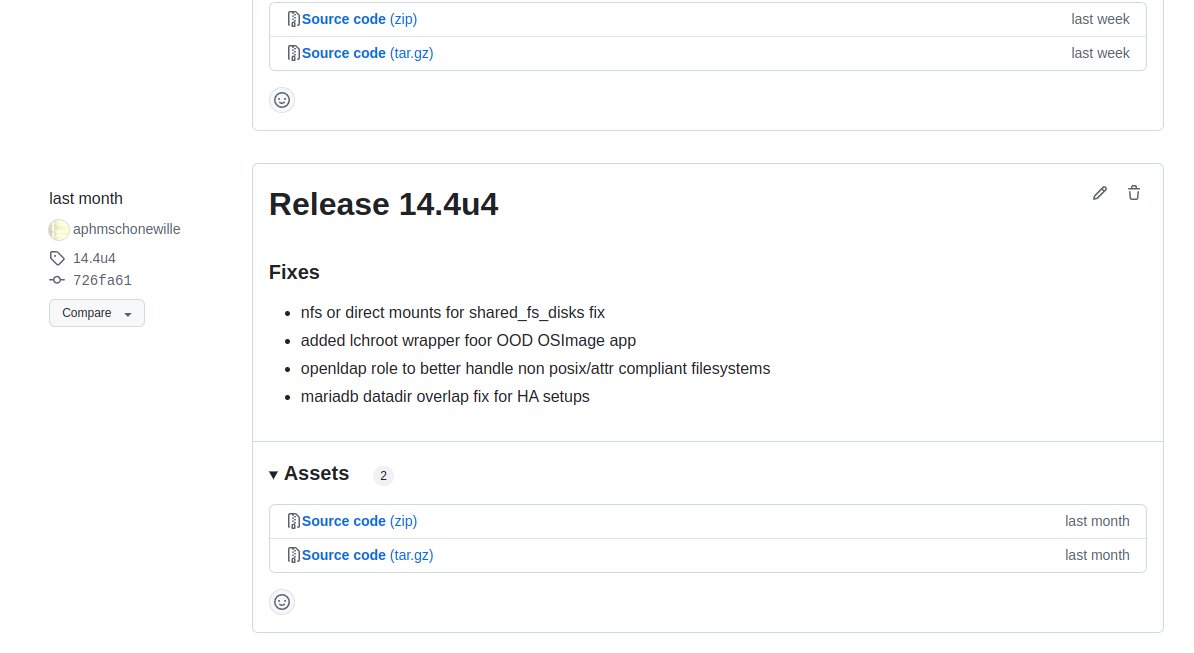
Other options are to download the tarred or zipped releases:
Pull upgrade from release 14.x to 15, or from 15 to 16
Running TrinityX 14 requires upgrading to 14.x, preferably 14.4 first before upgrading to 15. Though a immediate step from 14.4 to 16 is expected to work, it comes recommended to upgrade to latest 15 first, then upgrade to 16.
To upgrade a TrinityX 14.x, the latest TrinityX 15 branch (stable_15r3u1) has to be pulled in from github. This can be on top of an existing cloned repo or a clean clone. After that, follow the next steps.
Note
At the time of writing, TrinityX 15u2 (update 2) has been released that allow for the actual upgrade from 14.x to 15. This means that any release that comes after 15u2, e.g. 15u3 or 15.1 will allow for the upgrade path.In principle, similar steps are required to upgrade to 16 (main branch).
Update the group_vars/all.yml configuration
This step is important, which is verifying the differences between your existing group_vars/all.yml and group_vars/all.yml.example to work out possible differences. Think of keys or settings that were added since your last installation. The best approach would be to rename group_vars/all.yml, copy group_vars/all.yml.example to group_vars/all.yml and change the new all.yml according to your original (renamed) all.yml.
If the original all.yml file is no longer present, a new one can be created and hosts files can be configured. However note that all correct settings have to be configured (as how the current cluster is) to prevent unexpected effects. Also see installation steps.
Automated migration with the migration tool
The reconciliation described above can be done automatically with the migrate-all.yml.sh script, located in the site directory of the cloned or pulled repository. It uses group_vars/all.yml.example as the schema and rewrites your existing group_vars/all.yml to match the new layout, while keeping your settings:
- your customised string values from the existing
all.ymlare kept; - boolean and structured settings (lists, dictionaries, numbers) adopt the value from
all.yml.example; - options that no longer exist in
all.yml.exampleare dropped; trix_versionis set to the value fromall.yml.example(the release you are upgrading to);- the comments and key ordering from
all.yml.exampleare preserved.
Before your all.yml is overwritten, a copy is always written to all.yml.bkp in the same directory.
Run it from the site directory:
bash migrate-all.yml.sh
By default the tool is interactive: for every changed or newly added string or boolean option it shows the current value and a suggested value, and lets you accept the suggestion (press Enter) or type your own. Useful options:
| Option | Effect |
|---|---|
--keep-defaults |
Accept all suggested values without prompting (non-interactive). |
--dry-run |
Print the migrated file to the screen instead of writing it. |
--all-yml PATH |
Migrate a specific all.yml instead of group_vars/all.yml. |
--example PATH |
Use a specific all.yml.example as the schema. |
--output PATH |
Write the result to another path instead of overwriting all.yml. |
When it finishes, the tool reports which options were added, which changed values were reviewed, and which obsolete options were dropped. Review the resulting all.yml before running the playbooks.
Make a backup
Before running the playbook, e.g. controller.yml, make sure to make a backup of the following directories or files:
- /etc/slurm/* please note that /etc/slurm is a symlink
- /etc/ood
- /etc/trinity
- files in /trinity/local/ or /trinity/shared that have been modified after the initial TrinityX installation
The actual upgrading
in the site directory of the cloned or pulled repository, run the playbooks. The actual playbooks depends on what was run before or what is desired:
ansible-playbook controller.yml
ansible-playbook compute-default.yml
ansible-playbook <other>.yml
The <other>.yml refers to compute-default.yml or any other used compute yml file. This could include k3s-default.yml. This differs per site and choice. What was run before, as in which playbooks where used during the initial installation, have to be included again.
There is NO need to rerun prepare.sh before running the playbooks.
Restore files if needed
From the earlier made backup, files that were overwritten could be restored if needed. When files associated to a service were copied back, the service has to be restarted.
Updates
Updating using the cloned TrinityX branch
Updating relies on having the original cloned TrinityX repo on your local controller. When this is available, proceed with the actual updating process. If this one is no longer present, a fresh clone can be used and group_vars/all.yml file and hosts files can be configured. Also see installation steps. There would NOT be a need to rerun prepare.sh or the entire playbook(s). After the configuration of the required files, the next steps can be followed.
BIG NOTE: make sure to use the correct release to pull or clone. The main branch on github is always the latest. It is possible to clone using an older release by selecting it first:
Other options are to download the tarred or zipped releases:
Updating TrinityX components
Since all components are set up through the ansible code are sourced from other repositories or locations, these components can be upgraded without any change or alterations to the ansible code. In short, in most cases no new pull is required. The list below shows tested procedures for updating key components. If the component you're looking for is not in the list, please reach out to us.
Luna:
ansible-playbook controller.yml --tags=luna
ood-apps release 14.x:
ansible-playbook controller.yml --tags=ood-interactive-apps
ood-apps release 15:
ansible-playbook controller.yml --tags=ood-apps
monitoring:
ansible-playbook controller.yml [<other>.yml] --tags=monitoring
The optional <other>.yml refers to compute-default.yml or any other used compute yml file. This could include k3s-default.yml. This differs per site and choice. What was run before, as in which playbooks where used during the initial installation, have to be included again.
Notes
Backups
Please note that any of these updates and/or upgrades might (most likely) overwrite customizations as per installation notes. It's recommended to keep copies of your customizations and place these back or merge after the update or upgrade. In general it's good practice to have a backup before proceeding.